
A home rarely fails all at once. Small issues like a hairline roof crack, a sluggish furnace, or a wobbly porch board quietly worsen with each passing season until they become expensive emergencies. The good news is that most of these surprises are preventable with a predictable rhythm of seasonal checks. This checklist walks through the systems and spaces that matter most, so you can catch problems early and protect both your budget and your home’s long-term value.
Inspect Your Roof Before Weather Extremes Hit
Your roof takes the brunt of every season, from winter ice to summer sun, which makes spring and fall the two best times to check it closely. A quick inspection after the last frost and again before the first winter storm can catch damage while it’s still cheap to fix. Grab a pair of binoculars rather than climbing a ladder, and scan for missing, curling, or cracked shingles, along with rusted or lifted flashing around chimneys, vents, and skylights. Check your gutters for granules, which look like coarse black sand and signal that shingles are wearing thin. It’s also worth checking the attic on a sunny day for any pinpricks of daylight, and after a heavy rain for damp insulation or water stains on the rafters. Pay close attention to valleys where two roof planes meet, since debris and ice tend to collect there and accelerate wear. Soft spots underfoot if you do walk the roof, along with moss or dark streaking, often point to trapped moisture doing damage beneath the surface. If you notice sagging areas, daylight through the attic boards, or recurring leaks near the same spot, it is time to call in professionals rather than patch things yourself. A standard inspection typically runs $150 to $400 and can save you from a far costlier full replacement, which often starts around $8,000 depending on your roof’s size and material.
Many homeowners wait until a leak appears inside the house, but by then the damage usually extends well beyond the roof surface into insulation and drywall. What starts as a few displaced shingles can quietly rot the decking underneath, and that kind of repair often costs three to four times what an early fix would have run. Scheduling an annual inspection with experienced Roofing Contractors can catch minor wear, like curling shingles, cracked flashing, or granule loss in the gutters, before it becomes a structural issue. Spring and fall are the two best windows for this kind of checkup, since they fall right before the roof has to withstand summer heat or winter snow load. A thorough inspection should also include the attic, where signs of moisture, daylight through the roof boards, or sagging insulation often reveal problems long before they show up as a ceiling stain. Getting quotes from a couple of established roofing companies each year also gives you a realistic sense of your roof’s remaining lifespan and helps you budget for eventual replacement instead of being blindsided by it. Most asphalt shingle roofs last 20 to 25 years, but factors like attic ventilation, steep rooflines, and storm history can shorten that window considerably. Comparing notes from different inspectors also helps you spot inconsistent assessments and make a more informed decision when replacement time finally arrives.
- Check for curled, cracked, or missing shingles after major storms, hail, or high winds
- Scan for granule loss in gutters or downspouts, a sign shingles are wearing thin
- Clear debris from valleys and gutters where water pools, since clogs can force water under shingles
- Look inside the attic for stains, daylight gaps, or musty odors that signal leaks
- Check attic insulation for dampness or compression, which reduces its effectiveness
- Note the age of your roof (most asphalt shingles last 20-25 years) so you can plan ahead for replacement
- Schedule a professional inspection every 2-3 years, or immediately after severe storms
Test Your Heating System Before Temperatures Drop

Furnaces and heat pumps tend to fail at the worst possible moment, usually during the first serious cold snap of the year. Running your heating system for a short test cycle in early fall, before you actually need it, gives you time to address problems without freezing while you wait for a technician. Listen for unusual rattling, grinding, or clicking sounds, and pay attention to any burning smell that lingers more than a few minutes after startup.
Replacing air filters every one to three months keeps airflow efficient and reduces strain on the blower motor, which is one of the most common reasons systems break down early. If your thermostat struggles to maintain a steady temperature or certain rooms stay noticeably colder than others, a professional heating repair visit can diagnose whether the issue is mechanical, electrical, or related to ductwork. Catching these issues in October is far cheaper and less stressful than discovering them in January.
- Replace or clean filters at the start of each heating season
- Test thermostat accuracy with a separate room thermometer
- Vacuum vents and baseboard registers to improve airflow
- Schedule a tune-up before the first cold week of the year
Prepare Your Cooling System for Summer Demand
Air conditioning systems work hardest during the exact months when a breakdown is most uncomfortable and most expensive to fix on an emergency basis. Before summer arrives, check that the outdoor condenser unit is free of leaves, grass clippings, and overgrown vegetation, since restricted airflow forces the system to work harder than it should. Indoors, confirm that vents are open and unobstructed and that the condensate drain line is not clogged, as a blocked line can lead to water damage around the unit.
If your system is more than twelve to fifteen years old, frequently needs recharging, or struggles to keep the house cool on moderately warm days, it may be more cost effective to consider new AC installation rather than continuing to repair an aging unit. Weigh the cost of repeated service calls against the long-term energy savings of a newer, properly sized system. A professional load calculation can determine whether your current unit is even the right size for your home, which is a detail many homeowners never realize is affecting their comfort and their bills.
- Clear debris and vegetation from around the outdoor unit
- Change filters monthly during peak cooling season
- Check that condensate lines drain freely without clogs
- Compare repair costs against the value of a newer, efficient system
Address Minor Air Conditioning Issues Before They Escalate
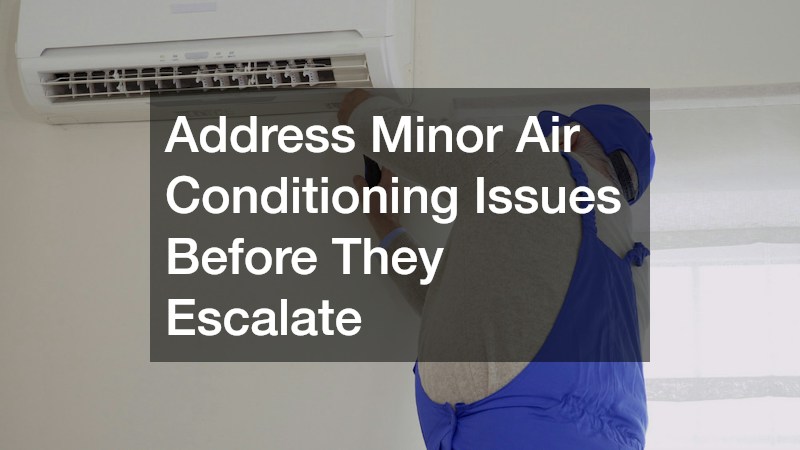
Not every cooling problem means you need a replacement system, and many issues are relatively minor if caught early. Warm air blowing from vents, unusual cycling on and off, or a noticeable rise in humidity indoors can all signal a refrigerant leak, failing capacitor, or dirty coil. These are typically straightforward for a technician to resolve during a routine AC repair visit, especially if you schedule service at the first sign of trouble rather than waiting for the unit to stop working entirely.
Ice forming on the refrigerant lines is a particularly common red flag that homeowners misinterpret as a good sign, when in fact it usually means airflow is restricted somewhere in the system. Turning the unit off and letting it thaw before restarting can prevent further damage while you wait for service. Keeping a simple log of strange noises, smells, or performance changes also helps a technician diagnose the issue faster when they arrive.
- Watch for warm airflow or reduced cooling capacity
- Note any ice buildup on refrigerant lines or the outdoor unit
- Listen for grinding, squealing, or rattling during operation
- Schedule service promptly rather than waiting for a full shutdown
Check Plumbing Fixtures and Pipes for Seasonal Stress
Plumbing systems face different pressures depending on the season, from frozen pipes in winter to increased outdoor water use in summer. Before the first hard freeze, disconnect garden hoses, insulate exposed pipes in crawl spaces, and know where your main shutoff valve is located in case of an emergency. In warmer months, check for slow leaks under sinks, around toilet bases, and near water heaters, since even small drips can quietly raise your water bill and cause hidden damage over time.
Water heaters also deserve a seasonal look, particularly if yours is more than eight years old or has started making popping or rumbling sounds. A licensed plumber can flush sediment buildup, check the pressure relief valve, and spot early signs of corrosion that often lead to sudden tank failures. Addressing these small maintenance tasks twice a year is far less disruptive than dealing with a burst pipe or a flooded basement.
- Insulate exposed pipes before the first freeze of the season
- Check under sinks and around appliances for slow leaks
- Flush the water heater annually to reduce sediment buildup
- Know the location of your main shutoff valve
Guard Your Yard Against Seasonal Pest Pressure

Warmer months bring more than just overgrown grass and blooming flowers, they also bring a sharp rise in outdoor pest activity, particularly from ticks hiding in tall grass, leaf piles, and wooded edges of the property. These pests pose real health risks to both family members and pets, so keeping lawns trimmed and clearing brush near walkways significantly reduces exposure. Professional tick control treatments applied in spring and reapplied through the summer can dramatically cut down on the population before it becomes a problem near high traffic areas of the yard.
Beyond ticks, seasonal shifts also bring ants, wasps, and rodents looking for easier access as temperatures change. Sealing small gaps around foundations, doors, and windows removes one of the most common entry points before pests become an indoor problem. A quick walk around the exterior of the house each season, checking for new cracks or openings, is a simple habit that prevents much larger infestations later.
- Keep grass trimmed short and clear leaf litter regularly
- Treat yard perimeters before peak tick season begins
- Seal gaps around foundations, utility lines, and window frames
- Store firewood away from the house to limit rodent nesting
Evaluate Outdoor Structures for Weather Damage
Porches, decks, and railings absorb a surprising amount of seasonal wear, from winter ice expansion to summer humidity that causes wood to swell and contract. Walk the full perimeter of any porch each season, checking for soft spots, loose railings, and nails that have started to back out of the boards. These small signs often indicate moisture has gotten underneath the surface, which can lead to rot that spreads faster than most homeowners expect.
If boards flex noticeably underfoot or you notice gaps widening between planks, scheduling porch repair sooner rather than later keeps the project small and manageable. Waiting until a board breaks through often means replacing a much larger section than if the issue had been caught early. Resealing or repainting exposed wood every couple of years also adds a protective layer against the next season’s weather swings.
- Check for soft, spongy, or discolored boards
- Inspect railings and steps for looseness or instability
- Reseal or repaint exposed wood on a regular schedule
- Address small repairs before they require structural work
Staying ahead of seasonal wear does not require a major time investment, just a consistent habit of walking through your home’s key systems a few times a year. Catching a small roof issue, a sluggish heating cycle, or a soft porch board early almost always costs less than waiting for a full failure. Use this checklist as a recurring reminder each season, and reach out to qualified professionals whenever something looks or sounds out of the ordinary. A little attention now can spare you from a far more expensive surprise later.
